1
Introduction
Developing applications for iOS without a Mac computer can be quite a struggle. However, solutions are available for mobile developers to build and release iOS apps to the app store.
For example, with Odevio, you can build, test on an iOS simulator, and publish iOS apps without owning a Mac computer.
In this article, you are going to learn step by step how you can use Odevio to build and publish your iOS application.
- Note that you must have an active Apple Developer account subscription to publish an application.
- It is also recommended to have an iOS device to test your app on a physical device.
With Flutter, you don’t need a Mac to develop for iOS, but this is not the topic of this article. We assume that you already have an application, and you need a solution to deliver it to the end user. If you do not a have a Flutter iOS project, you can use Flutter’s first app.
2
Setting up App Store Connect with Odevio
Before you start building, you must connect Odevio to your Apple developer account and set up App Store connect for your application.
- Link Odevio to your Apple developer account
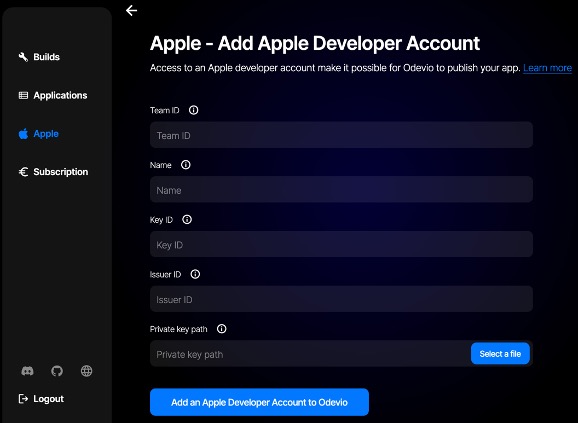
On Odevio, you simply have to go to the “Apple” menu and fill in the required fields. You can find a detailed tutorial on here: How to add an Apple developer account to Odevio. Basically, you need to generate an API key on App Store Connect and add it to Odevio’s interface.
On App Store Connect, navigate to Users and Access and Integrations menu. There, click on the ‘plus’ sign to generate a new API Key.
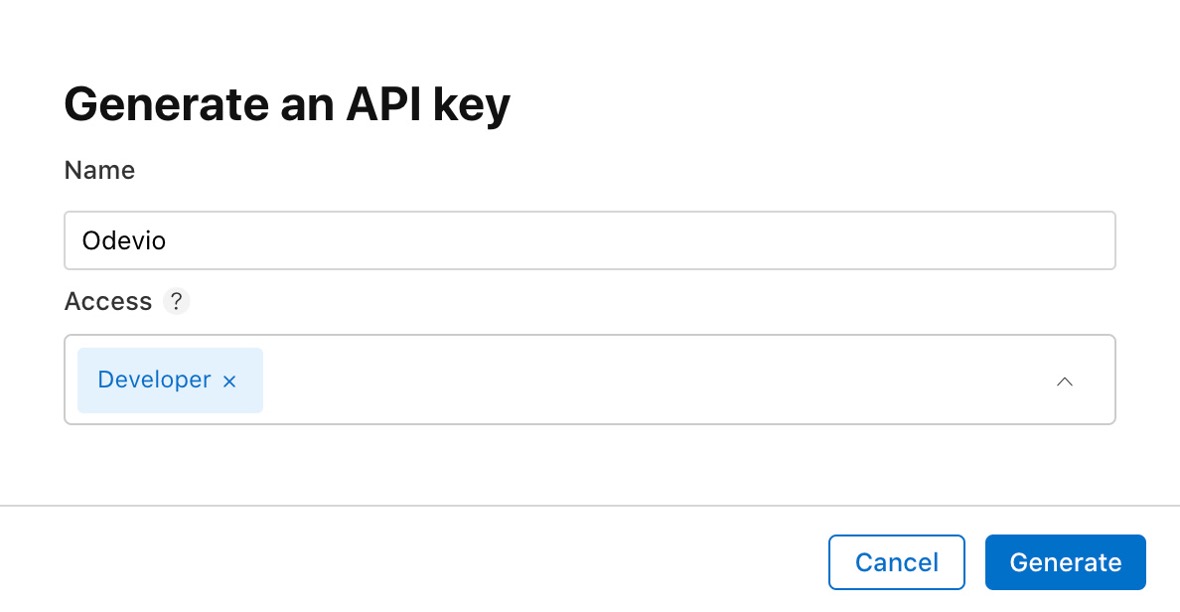
You will need to copy the Issuer ID, the key ID and download the key.

You almost have everything you need to complete the form; you can find the Team ID in your membership details.


- Create an application identifier
Now that you have linked Odevio to your Apple developer account, you also need to create your application identifier. You have the choice to create it from Odevio’s interface to Apple or create it on Apple and import it to Odevio.
Simply give a name to your identifier, a bundle ID and select your developer account.
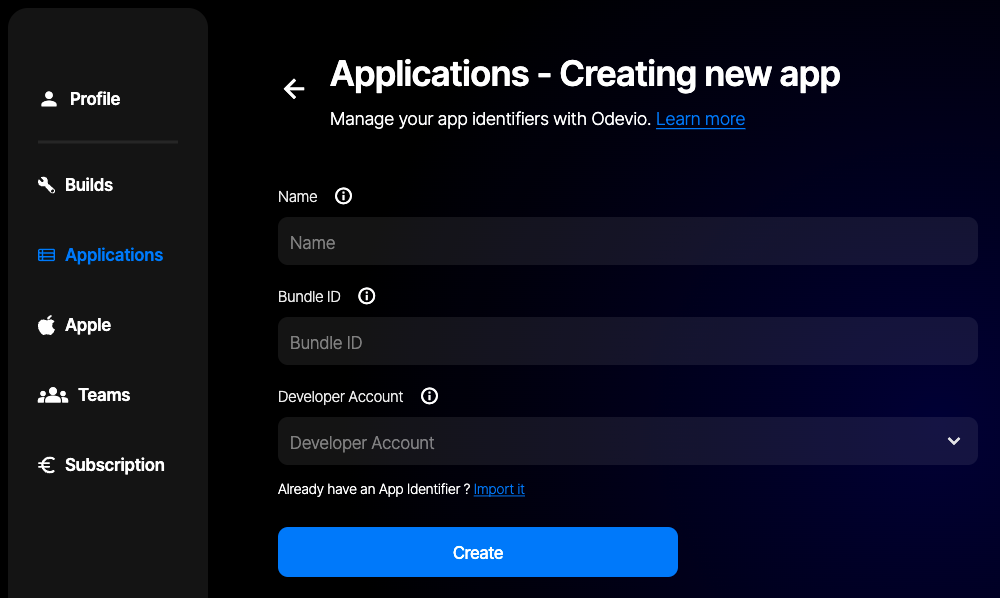
You can find more details about this step on this dedicated tutorial: How to create an App ID.
- Create your application in App Store connect
This is the last step you need to achieve before starting to build your application. Go to the apps section of the App Store Connect and click on the ‘plus’ sign to create a new app. You will be asked to complete some information about your application.
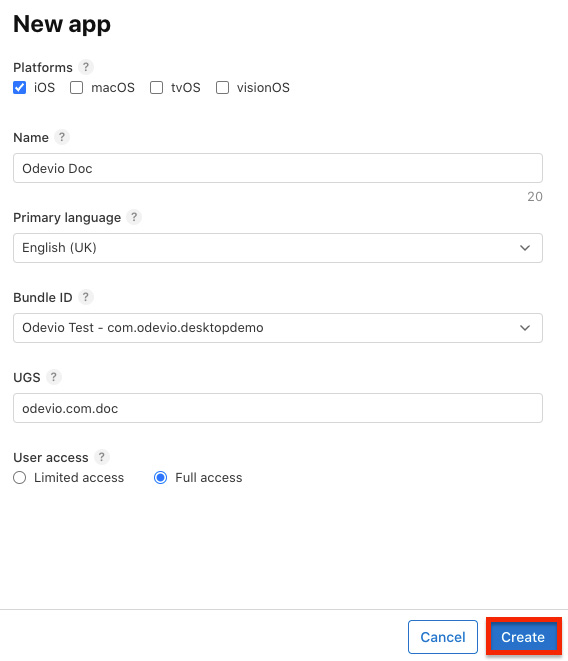
This will create an application on App Store Connect where you will be able to manage everything concerning your application. This is also where you will see your publication builds appear before you send them for review to Apple.
Now that you completed these 3 easy steps, you are now ready to build and publish your application! Don’t worry, you are almost done!
3
Building your iOS application for publication
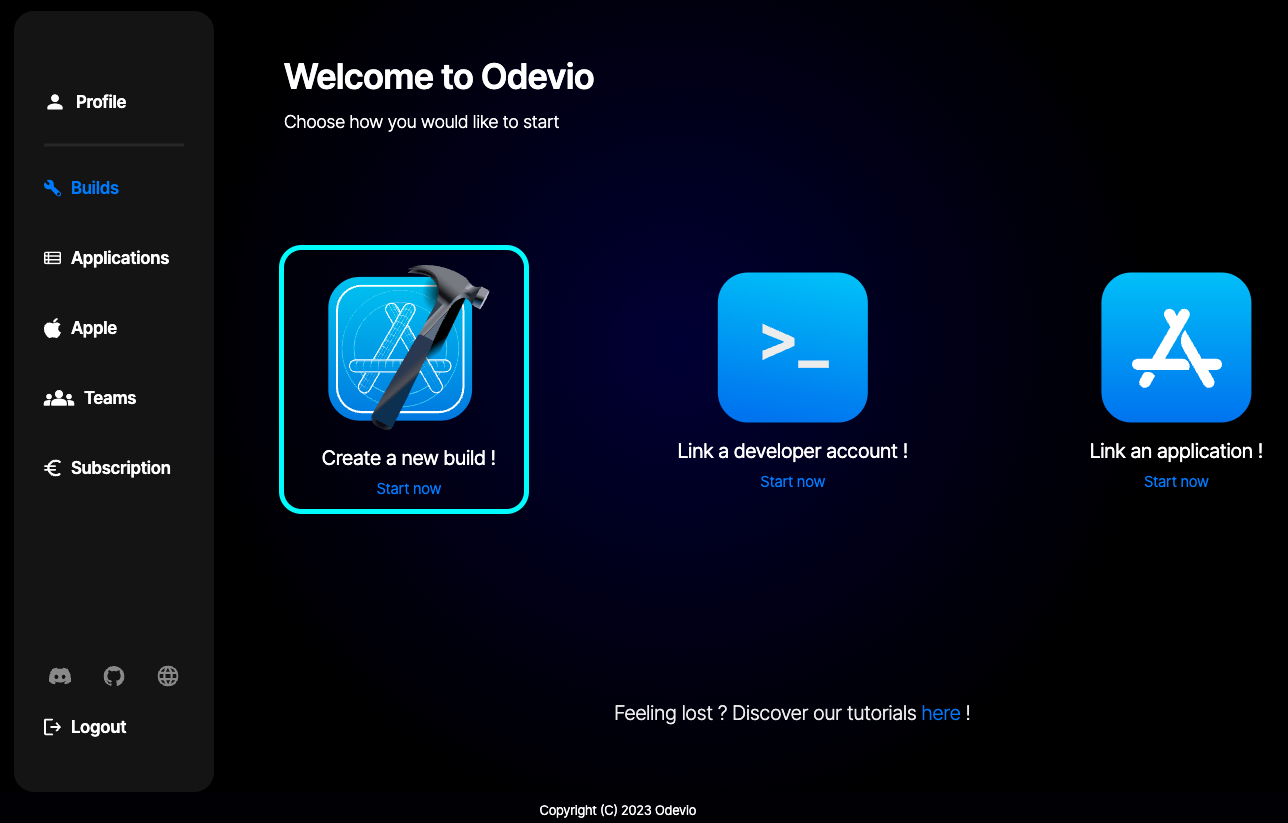
Now that you have set up Odevio with your Apple developer account and created your application, it is time to create your first builds. At this point you should have a Flutter project on your computer that is ready to publish. If not, we recommend that you try the following steps with Flutter’s first app.
Start by selecting the folder of your Flutter project. The other fields will appear after you selected your folder. In the application field, you should be able to select the identifier you created or imported earlier.
The build type determines which kind of build you want Odevio to create. In this guide, the one that interests us, is the ‘Publication’ build. This type of build will create a build version that Odevio will send to App Store Connect.
There are 6 types of different builds, each one of them with their own specific purposes.
The Flutter version is determined using a series of method depending on your project, but you are free to select the one you want from the list.
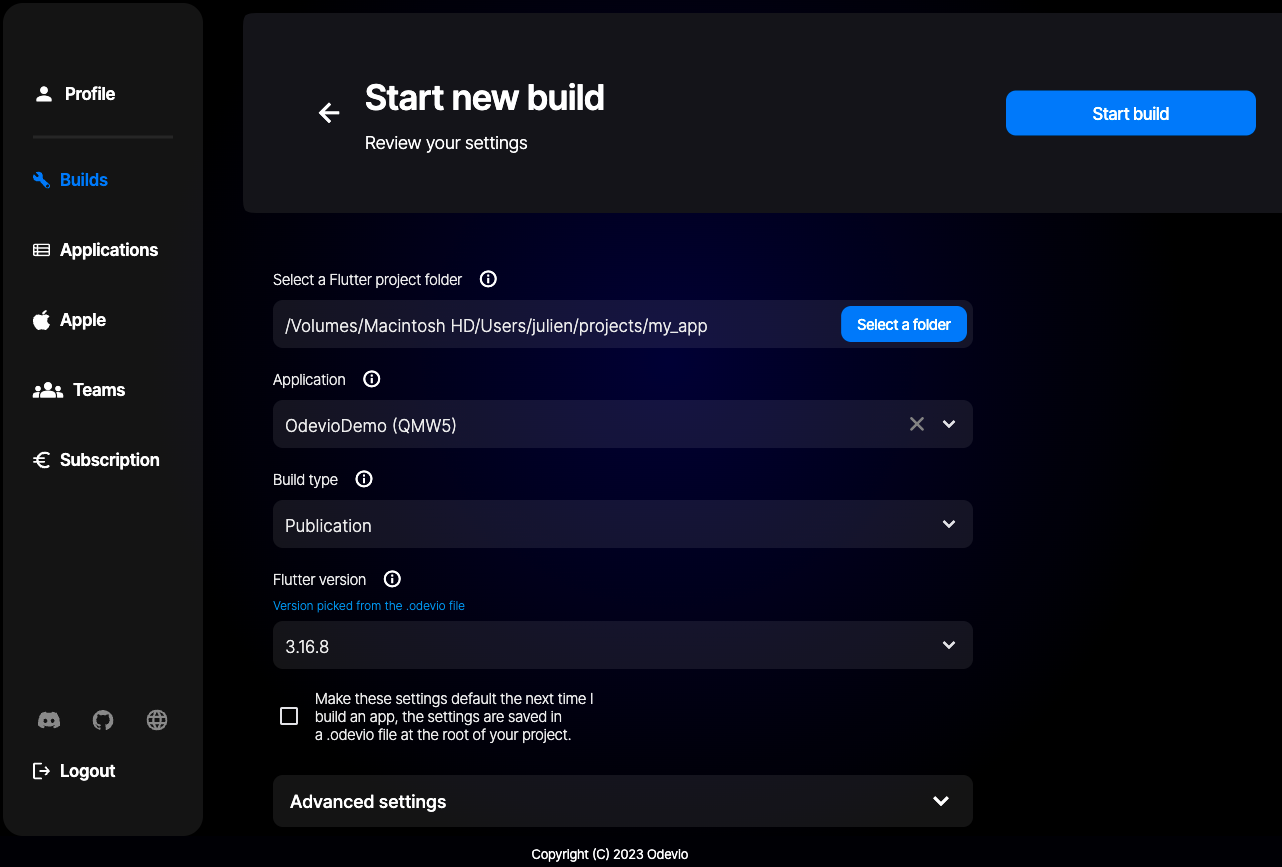
There is a section with advanced settings, you can check them out, but we will not go over them in this article.
Everything looks ready, you can press the Start build button. Odevio will publish your application to the App Store Connect in under 5 minutes.
During your ongoing build, you can review everything that is happening with the in real time logs windows. If your build fails, you will be able to debug your project with these logs.
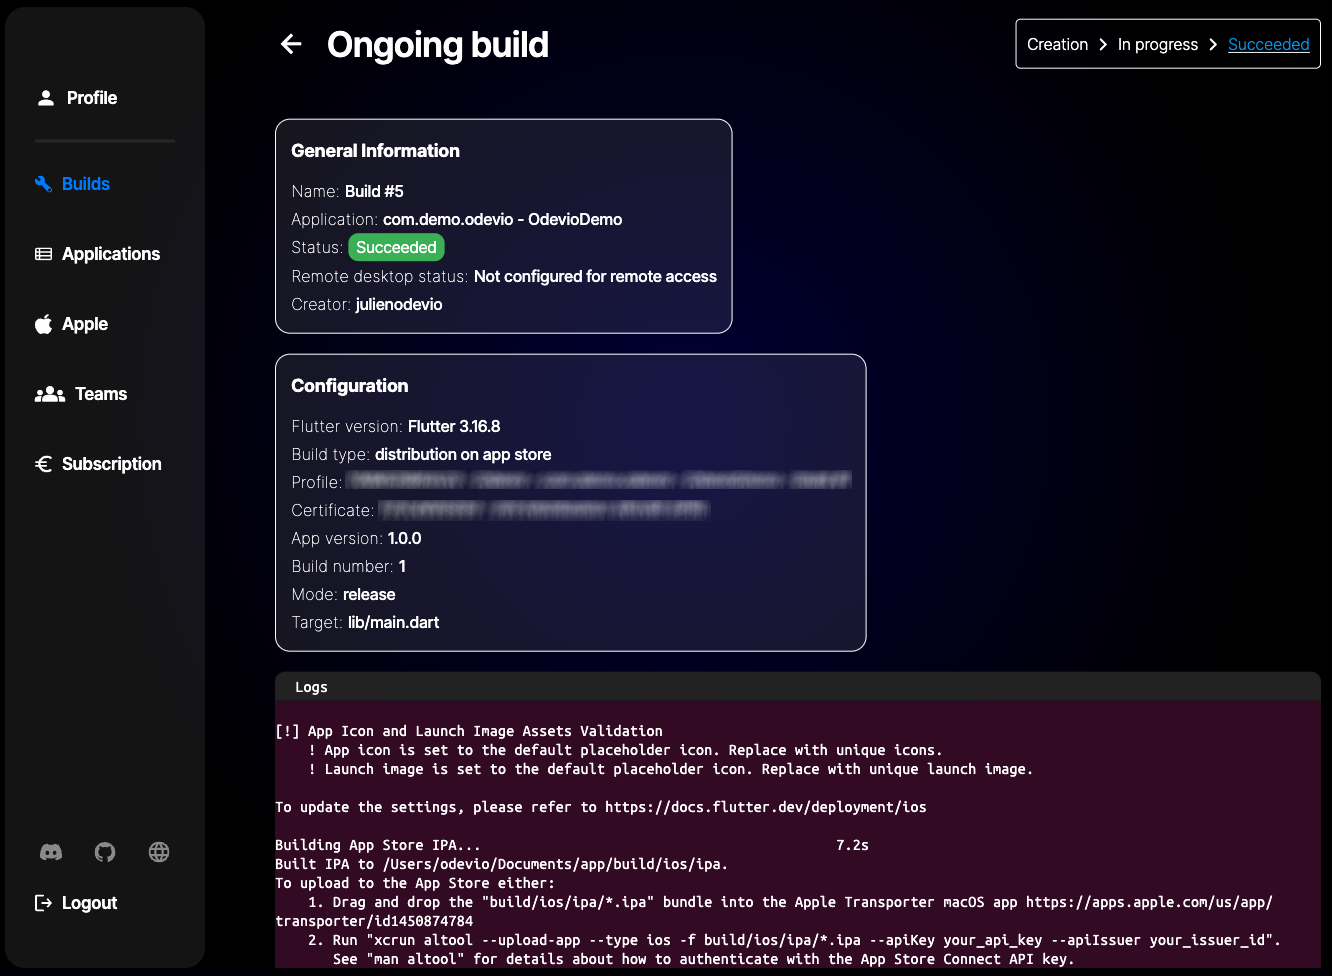
There might be different reasons why your build failed. To begin debugging you can start by creating a ‘Configuration’ build to review your Xcode settings. These kinds of builds allow you to connect seamlessly to a Mac VM and access your project’s settings in a Mac environment and test them with the iOS simulator.
Once that you are satisfied with your settings, you can create an ‘Ad Hoc’ type build which will provide you with the .ipa file of your application that you can use to download your application on an iOS physical device which is great to troubleshoot.
Once that you are satisfied with your configuration you can try to publish again with a ‘Publication’ build.
When your build succeeds, you will be able to see it on the App Store Connect in the folder of the application you created earlier.
There is a build section if you scroll down a bit. Click on the ‘Add a build’ button or the plus sign and select the build you just created.
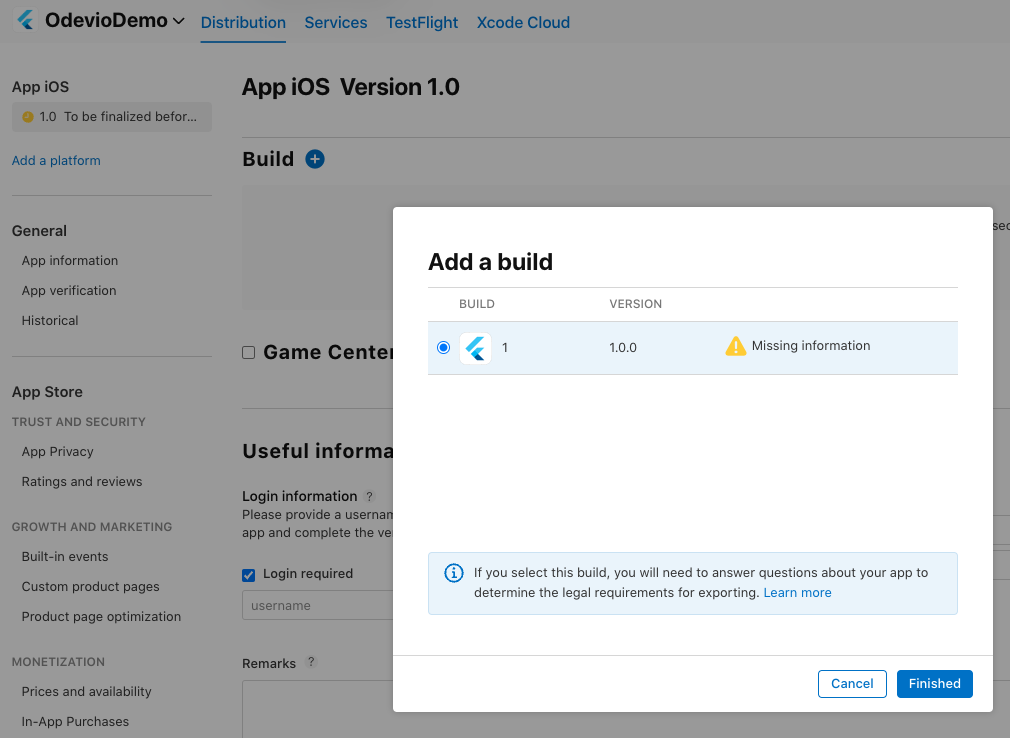
Don’t for to save in the top right-hand corner! Your application is now ready to send for verification. After a few days, you will receive an answer from Apple if your application has been accepted or not.
4
Conclusion
Flutter is great to develop cross-platform applications even if you don’t own a Mac. Odevio is a must have tool if you are developing on Windows and Linux as it allows you to complete the whole iOS publication process without owning a Mac computer.
With its App Store Connect integration it allows you and your team to work quickly by having a stable and streamlined deployment process.
Want to know more about Odevio and how it can be used by your favorite CI/CD tool? Contact us.